Setup
- Download the relevant Titanium Firebase Core module
- Download the relevant Titanium Firebase Cloud Message module
Add these to your app’s modules folder and reference them in your tiapp.xml file:
<modules>
<module platform="iphone">firebase.core</module>
<module>firebase.cloudmessaging</module>
</modules> - Go to Firebase Console and create a new project
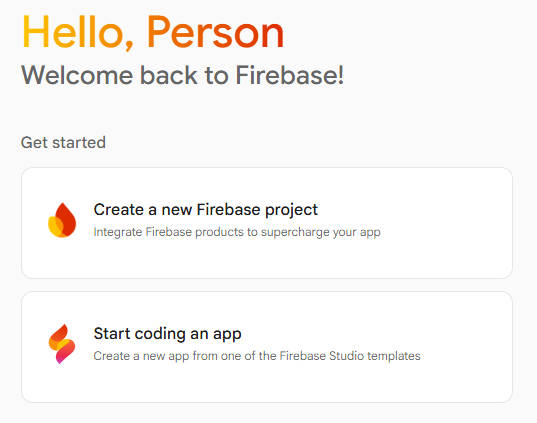
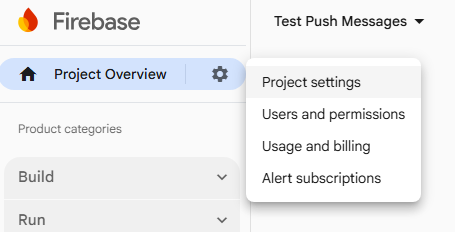
- When your project is created, go to Project Overview > Project Settings:
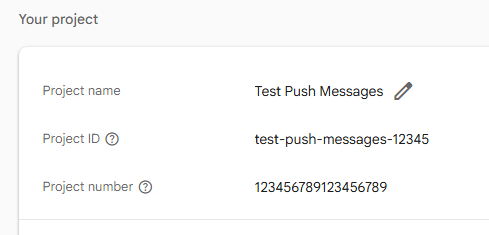
- Make a note of your Project’s ID as you’ll need this later:
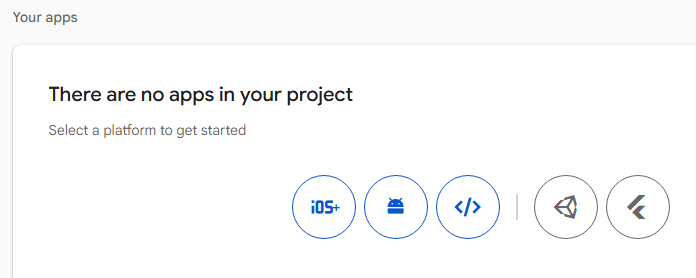
- Add an app to your project. Choose iOS and Android as necessary:
- Complete the App bundle ID field (using the app ID from your tiapp.xml file):
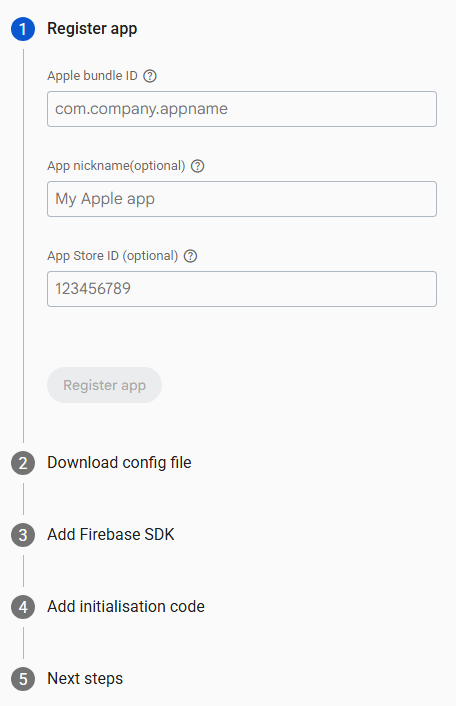
- And then download and keep the GoogleService-Info.plist file. This needs to be added to your Titanium app in one of two places, depending on whether the file is for iOS or Android:
| Platform | Location of GoogleService-Info.plist file |
|---|---|
| Android | /app/platform/android/ |
| iOS | /app/assets/iphone/ |
Setup – iOS only
- For iOS apps, you also need to upload a certificate to your Firebase Console and you generate this certificate from your Apple Developer account.
Within Certificates, IDs & Profiles, click into Keys: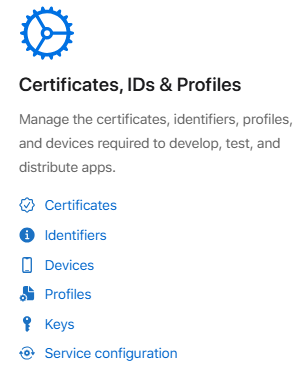
- Create a new key and enable Apple Push Notifications service (APNs). Be sure to configure the environment for this key as well:
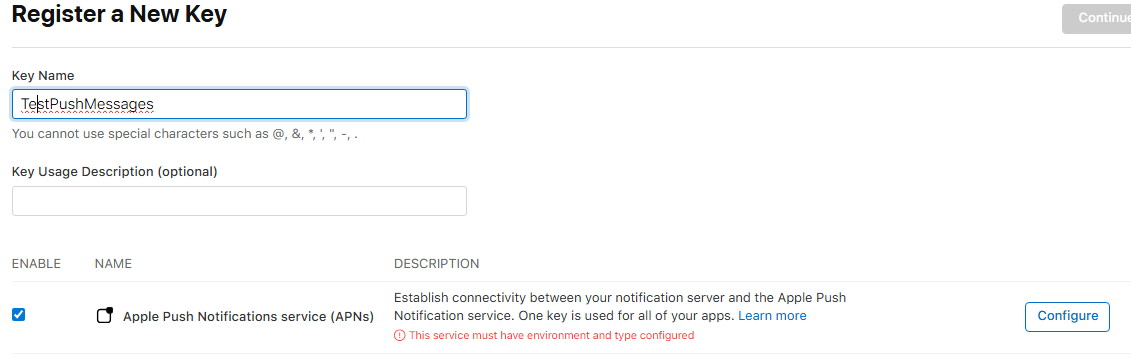
- When the key is created, download the key file and make a note of your Key ID as you’ll need this later:
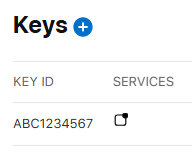
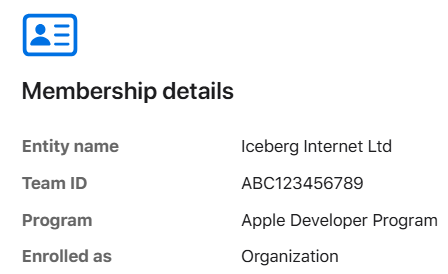
- Go back to your main Apple Developer Account page and click into Membership Details. Make a note of your Team ID as you’ll need this later too:
- Return to Project Settings in Firebase Console and click into the Cloud Messaging tab.
Against your iOS app, click Upload for the relevant APN Authentication Key environment: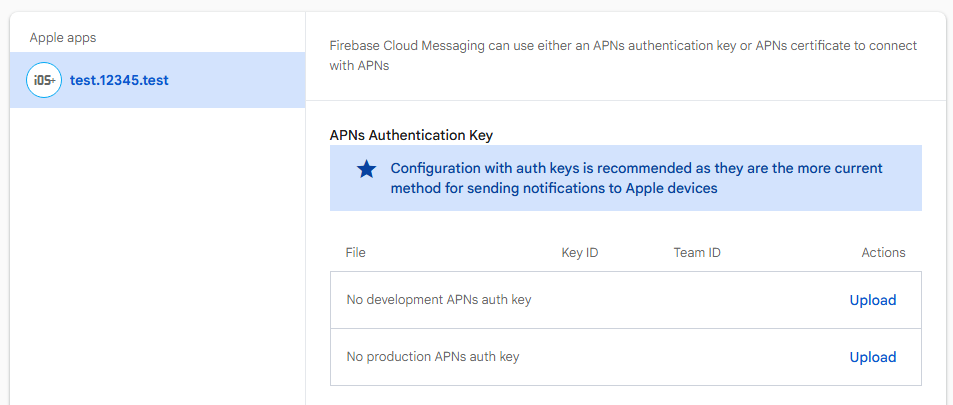
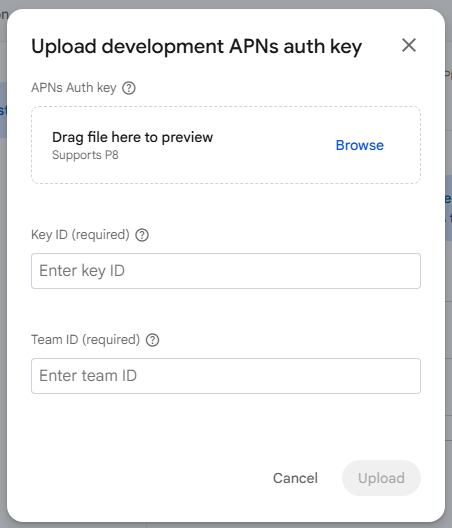
- Upload your key file and enter your Key Id and Team Id into the relevant boxes:
Coding your app to register for and listen for push messages
Refer to Michael Gangolf’s Use Firebase Push in your App article.
Sending a push message payload to Firebase using PHP
To send a test push message to your device, you can use this PHP code (which assumes installation of a JWT library):
<?php
use Firebase\JWT\JWT;
//Get OAuth 2.0 access token (you'll need to implement this)
$accessToken = getAccessToken();
//FCM V1 payload structure
$message = array(
'message' => array(
'token' => your-device-token,
// Cross-platform (basic)
'notification' => array(
'title' => 'Testing 123',
'body' => 'Just a test - this is not important'
),
// Android-specific
'android' => array(
'priority' => 'high',
'notification' => array(
'channel_id' => 'default',
'sound' => 'default',
'color' => '#1976D2',
'icon' => 'notification_icon',
'default_vibrate_timings' => true,
'notification_priority' => 'PRIORITY_HIGH'
)
),
// iOS-specific
'apns' => array(
'headers' => array(
'apns-priority' => '10'
),
'payload' => array(
'aps' => array(
'alert' => array(
'title' => 'Testing 123',
'subtitle' => 'New message',
'body' => 'Just a test - this is not important'
),
'badge' => 1,
'sound' => 'default',
'thread-id' => 'messages',
'interruption-level' => 'active'
)
)
),
// Custom data
'data' => array(
'message_id' => '12345',
'custom_field' => 'value'
)
)
);
$ch = curl_init();
// V1 API endpoint (replace YOUR_PROJECT_ID with your Firebase project ID)
curl_setopt($ch, CURLOPT_URL, 'https://fcm.googleapis.com/v1/projects/YOUR_PROJECT_ID/messages:send');
curl_setopt($ch, CURLOPT_POST, true);
curl_setopt($ch, CURLOPT_RETURNTRANSFER, true);
// V1 uses OAuth 2.0 Bearer token
$headers = array(
'Authorization: Bearer ' . $accessToken,
'Content-Type: application/json; UTF-8'
);
curl_setopt($ch, CURLOPT_HTTPHEADER, $headers);
curl_setopt($ch, CURLOPT_POSTFIELDS, json_encode($message));
$result = curl_exec($ch);
$intHTTPCode = curl_getinfo($ch, CURLINFO_RESPONSE_CODE);
echo "HTTP Code: " . $intHTTPCode . "\n\n";
echo '<pre>';
print_r(json_decode($result, true));
echo '</pre>';
curl_close($ch);
// Function to get OAuth 2.0 access token
function getAccessToken() {
//Check if we have a cached valid token
$cacheFile = sys_get_temp_dir() . '/fcm_access_token_cache.json';
if (file_exists($cacheFile)) {
$cached = json_decode(file_get_contents($cacheFile), true);
// Check if token is still valid (with 5 min buffer)
if ($cached && isset($cached['expires_at']) && $cached['expires_at'] > time() + 300) {
return $cached['access_token'];
}
}
$serviceAccount = json_decode(file_get_contents(PATH_TO_SERVICE_ACCOUNT_FILE), true);
// Create JWT
$now = time();
$jwt_payload = array(
'iss' => $serviceAccount['client_email'],
'scope' => 'https://www.googleapis.com/auth/firebase.messaging',
'aud' => 'https://oauth2.googleapis.com/token',
'iat' => $now,
'exp' => $now + 3600
);
$jwt = JWT::encode($jwt_payload, $serviceAccount['private_key'], 'RS256');
// Exchange JWT for access token
$ch = curl_init();
curl_setopt($ch, CURLOPT_URL, 'https://oauth2.googleapis.com/token');
curl_setopt($ch, CURLOPT_POST, true);
curl_setopt($ch, CURLOPT_RETURNTRANSFER, true);
curl_setopt($ch, CURLOPT_POSTFIELDS, http_build_query(array(
'grant_type' => 'urn:ietf:params:oauth:grant-type:jwt-bearer',
'assertion' => $jwt
)));
$response = json_decode(curl_exec($ch), true);
curl_close($ch);
return $response['access_token'];
}
 Back to all articles